How to configure Symfony 2.0 on Ubuntu Server 2011.4
PHP is annoying, but PHP 5.3 does its very best to try to best less annoying. Figuring I'd get back into PHP coding (as a hobby, I am currently doing PHP for work), I decided I would try out Symfony 2.0. If you don't know what Symfony is, you probably took a wrong turn somewhere. No, your Garmin does not know everything.
Since I'm a wonderful person and there doesn't seem to be a dead-simple-my-mom-could-do-this guide out yet, here goes! A guide on how to get Symfony 2.0 up and running on Ubuntu Server 2011.4.
Note: this tutorial assumes you have PHP and Apache running on your machine. When installing Ubuntu Server from the disk, I chose the LAMP stack to be installed by default.
Download and Extract
- Download the framework from the Symfony website. Here's a link, because the only reason you're reading this is because you're lazy. I am working with the Symfony Standard 2.0 BETA1 (.tgz) package.
- Either download the package directly to your /var/www directory or move it there yourself. Cool people use wget.
cd /var/www wget -O symfony.tgz http://symfony.com/download?v=Symfony_Standard_Vendors_2.0.0BETA1.tgz tar xfz symfony.tgz - You'll now have a directory labelled
Symfonyin your/var/wwwdirectory.
Prepare
- Now navigate to
http://localhost/Symfony/web/config.php. Note: Symfony requires that the config script is only run through localhost. Since I was remoting into my server through SSH, this posed a bit of a problem. I ended up redirecting port 80 on my server to port 1337 on my local machine with Putty. Jealous much? Here's how to do it. - I got all kind of requirements and warnings when I got to
config.php. Below is a list of all the hoops I had to jump through to get Symfony to shut up and install. I did them all, although some were "only recommended."- Install and enable the SQLite or PDO_SQLite extension. Just run these two commands. It doesn't matter what directory you're in.
apt-get install php5-sqlite sudo apache2ctl restart - Change the permissions of the
app/cache/directory so that the web server can write into it.sudo chmod -R 777 /var/www/Symfony/app/cache - Change the permissions of the
app/logs/directory so that the web server can write into it.sudo chmod -R 777 /var/www/Symfony/app/logs - Set the
date.timezonesetting inphp.ini. (likeEurope/Paris).sudo vim /etc/php5/apache2/php.iniFind the line with
;date.timezone =under the[Date]section, and set it to your timezone based on PHP's list of timezones. I choseAmerica/New_Yorkbecause sometimes I wish I lived there. Also, make sure to remove the semicolon at the beginning of the line!sudo service apache2 restart - Install and enable a PHP accelerator like APC (highly recommended).
sudo apt-get install php-apc sudo apache2ctl restart - Install and enable the
intlextension.sudo apt-get install php5-intl sudo apache2ctl restart - Set
short_open_tagtooffinphp.ini.sudo vim /etc/php5/apache2/php.iniFind the line with
short_open_tag = Onand change it toshort_open_tag = Off
- Install and enable the SQLite or PDO_SQLite extension. Just run these two commands. It doesn't matter what directory you're in.
- If there are any other requirements that I don't have listed, let me know, and I'll add them for future lazy bums.
Configure
- At the end of the configuration script, it will try to write to
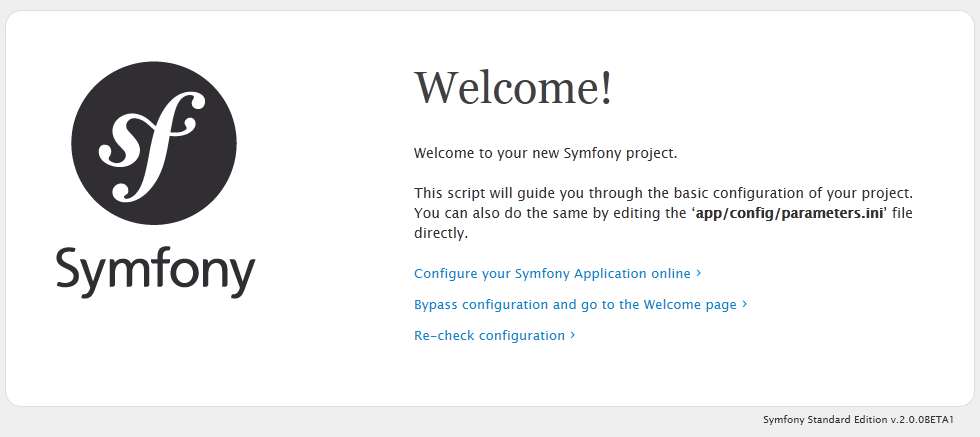
/var/www/Symfony/app/config/parameters.ini, so we have to make sure it's writable.sudo chmod 777 /var/www/Symfony/app/config/parameters.ini - Now that you've got everything set up properly, we can actually configure Symfony! If you haven't already, go to
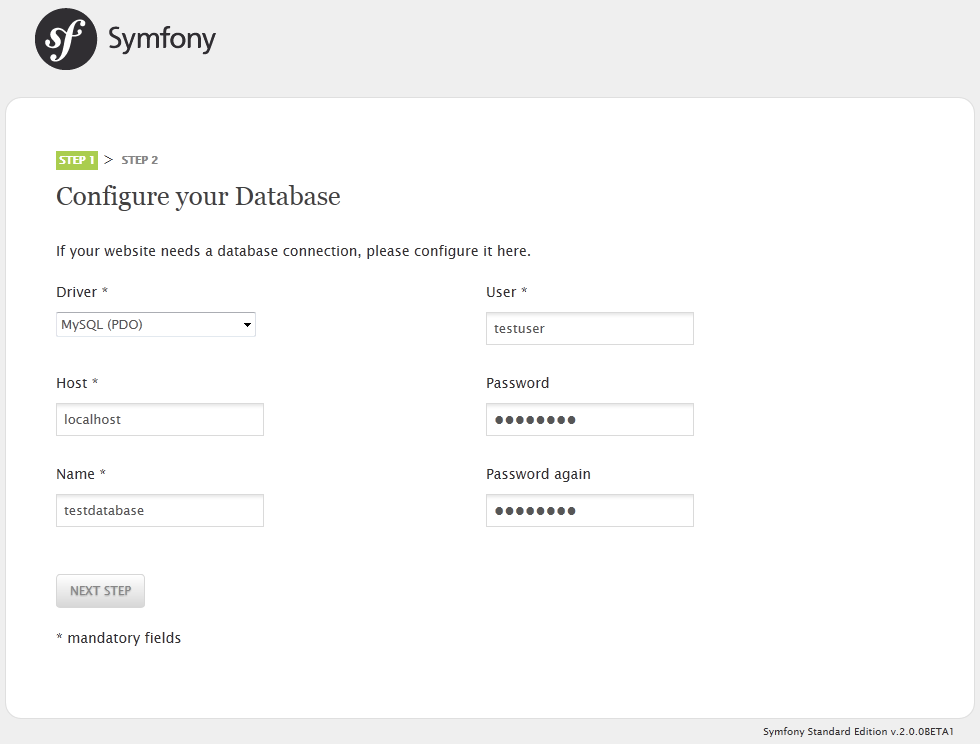
http://localhost/Symfony/web/config.php(screenshot) - You'll first be asked to provide database information. I did MySQL because it's what I'm comfortable with. (screenshot)
- Then you'll be asked to set up a hash thingy for CRSF protection. Yah, whatever. (screenshot)
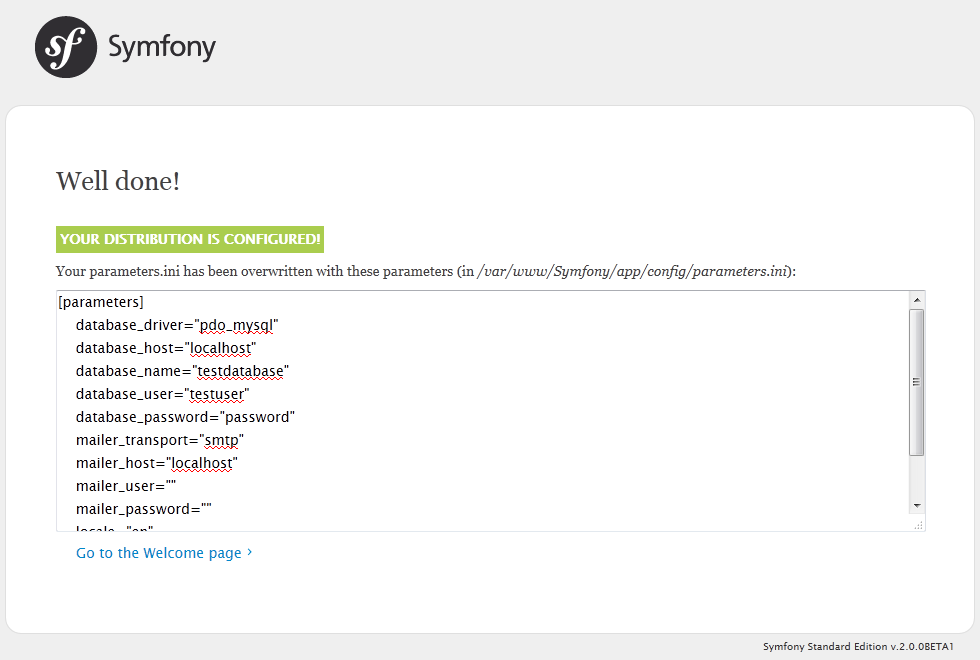
- It will then try to write all this configuration stuff to your parameters.ini file. It should go through if you were paying attention during step 1. (screenshot)
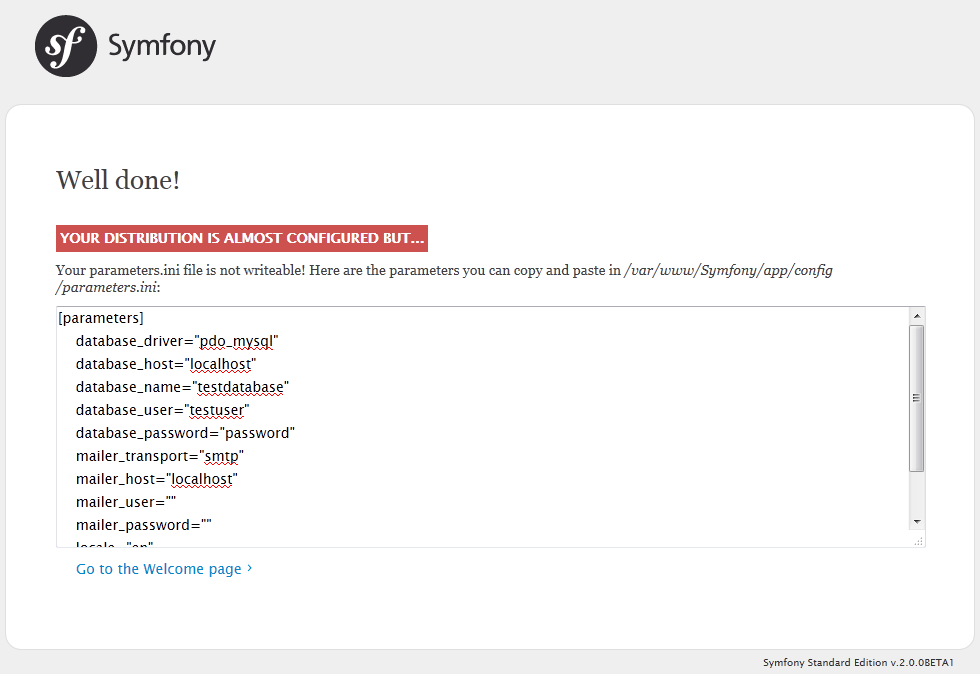
- Otherwise, you can just copy the configuration information over manually. But seriously, if you wanted to do that, you wouldn't be reading this guide. (screenshot)